


2.11.1 Printing oct facets
A block diagram under pigi is stored as an oct facet. To print it to a PostScript printer, first save the facet. Do this by moving the mouse to the facet and press the "S" key to save. The facet must be saved. Then, keeping the mouse in the facet, invoke the "print facet" command from the "Other" pigi menu. You will get a dialog box that looks like this: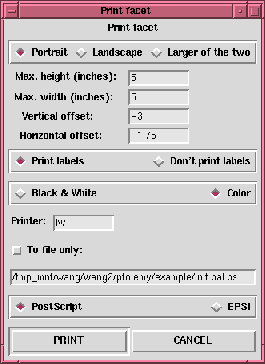
setenv PRINTER printername
You will have to restart pigi for this change to be registered.
The "EPSI" option will create Encapsulated Postscript output. Note that you need to have GNU ghostscript installed to generate EPSI. See "Other useful software packages" on page A-14 for further information about GNU ghostscript.
2.11.2 Capturing a screen image
Under the X window system and compatible systems, there are facilities for capturing screen images. These can be used directly with Ptolemy. However, colors that work well on the screen are not always ideal for hardcopy. For this reason, two sets of alternative colors have been devised for use with black and white printers, these color sets are selected at startup with the pigi command line option -bw or -cp. For black and white printers, use the -bw command line option when starting Ptolemy, as in:pigi -bw
The screen capture command can be used effectively. For example, under the X Window system, the following command will print a window on a black and white PostScript printer:xwd | xpr -width 4 -portrait -device ps -gray 4 | lpr
If you wish to grab the window manager frame, then you can use:xwd -frame > myfile.xwd
Other alternatives include a program called xgrabsc or some equivalent that may be available on your windowing system. A simple use of this is to generate an encapsulated PostScript image using the following commandxgrabsc -eps -page 4x2 -o mySchematic.ps
where "mySchematic.ps" is the name of the file into which you would like to store the EPS image. Then with the left mouse button, draw a box around the desired portion of the screen. This command will then save an encapsulated PostScript file four inches by two inches called mySchematic.ps. This file can then be used an a wide variety of document processing systems. To grab an entire window, including whatever borders your window manager provides, use the xgrabsc -click option. Importing an image as PostScript
For example, to include this PostScript in a TeX document, include the command \include{psfig}
in the TeX file and use the commands\begin{figure}
\centerline{
\psfig{figure=mySchematic.ps,width=4in,height=2in}}
\caption{Ptolemy Schematic}
\end{figure}
#include line. For example, the text box might contain the following line:
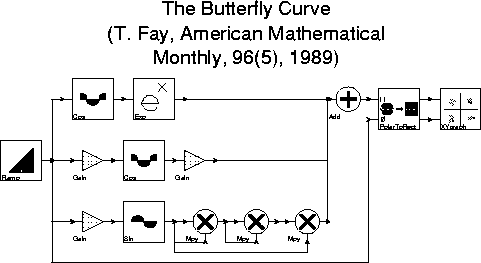
#include /users/ptolemy/doc/users_man/figures/butterfly.psUnfortunately, the file must be specified using an absolute path, unless you always start FrameMaker from the same directory. With the cursor in the newly created text column, issue the command "Customize Text Frame" from the "Customize Layout" submenu in the "Format" menu, and select "PostScript code." When you print the document, you will get the following graphic:
The second disconnected text column is created in a similar fashion with the Graphics tool, but text is entered into the text column rather than the include directive.
It is possible, instead of using the
#include line as above, to directly import the PostScript file into FrameMaker. However, this makes the text document very large, and the FrameMaker process appears to grow in size uncontrollably. Unfortunately, as of this writing, it does not appear possible to convert these PostScript files to encapsulated PostScript, which would have the advantage of displaying a semblance of the image.
Maker.colorImages: True
Maker.colorDocs: TrueOne can use various programs, such as the FrameMaker 3.1 utility
fmcolor and the Poskanzer Bitmap (PBM) tools to reduce a color window dump to a black and white window dump. This will save space and avoid any dithered imitations of color. However, since fmcolor applies a threshold based on color intensity to the image, some foreground colors may get mapped to white instead of black. To prevent this, use the -cp (cp stands for color printer) command line option when starting pigi, as in
pigi -cpThen color window dumps can be converted to black and white window dumps using the following FrameMaker 3.1 command:
fmcolor -i 90 filein fileoutA useful hint when using such a document editor is to turn off the labels in
pigi before capturing the image, and then to use the document editor itself to annotate the image. The fonts then will be printer fonts rather than screen fonts. To turn off the labels, execute the vem command "layer-display" under the vem "Options" menu.
Copyright © 1990-1997, University of California. All rights reserved.